Friday, August 8, 2014

Sneak Peek: Lovely Lace Bracelet sample

Yesterday I got the rough version of Teejay's "Lovely Lace Bracelet" tutorial and gave it a run-through last night. It came out perfectly even though I inadvertently changed some of the beads. When I posted HERE the other day about the bracelet Teejay had sent me, I thought that she had used 3mm druks for the connectors between the motifs. It turns out that she actually used 8/0 seed beads that are the same color as some 3mm druks that I have by the same color name. So, the sample in the photo below has druks for the connectors and I will now go and make another sample using 8/0 seed beads to see what difference they make. After I make some more samples, I'll start working on the final version of the tutorial and will post it here as a free download. I'll get it made as quickly as I can so please be patient.


These are the beads that I used to make this sample:

  • 15/0 seed beads Miyuki "Dark Bronze" (15-457D)
  • 11/0 seed beads Miyuki "Dark Bronze" (11-457D)
  • 3mm druks "Jet Copper Picasso" (no longer available)
  • 3mm druks "Rose Pink" (Nirvana Beads)
  • 3mm druks "Bronze"

Bracelet of the Day: Duo Bobble Band - Aqua & Silver


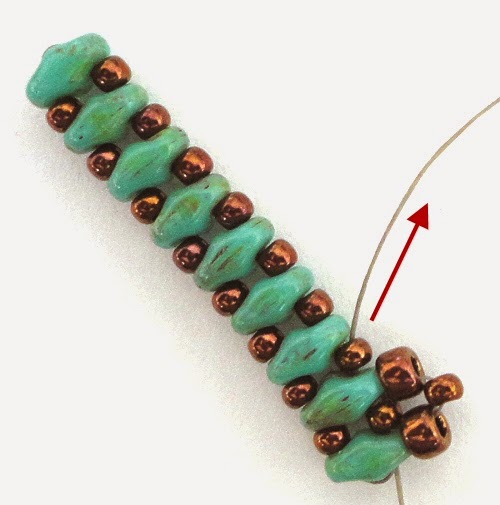
DUO BOBBLE BAND (LIZBETH BAND)
  • 11/0 seed beads Miyuki "Duracoat Pale Mink" (4221)
  • SuperDuo beads "Turquoise Green Picasso"
  • 4mm rondelles "Opaque Aqua" (Chinese)

This bracelet was a gift for my sister-in-law's birthday, which is today. I love the color and I just happened to have some rondelles in a color nearly identical to the SuperDuo beads. The only difference is that the SuperDuos have some "Picasso" on them.

UPDATE 1/24/18: A free pattern is now available and the new name for this pattern is "Lizbeth Band". Visit THIS post to download the free pattern.


Wednesday, August 6, 2014

Bracelet of the Day: Lovely Lace Bracelet

LOVELY LACE BRACELET
  • 15/0 seed beads Matsuno "Copper" (15-457A)
  • 11/0 seed beads Matsuno "Copper" (11-457A)
  • 3mm druks "Mint Picasso" (Nirvana Beads)
  • 3mm druks "Jet Picasso"
  • 3mm round metal beads "Copper" (Hobby Lobby)

My friend, Teejay, created this bracelet just for me. Isn't it beautiful? It looks like pretty lace edging so I named it "Lovely Lace Bracelet". I'm waiting for Teejay to send me the instructions so that I can try making one myself.


Sunday, August 3, 2014

Playing with my Beads...LiriGal's bracelet tweaked

I've come up with something that lays relatively flat but still looks similar to LiriGal's bracelet. I also wasn't happy with the plain edge on LiriGal's so I embellished mine. I'll try to describe what I did below. I added numbers to LiriGal's pattern so you'll know which steps I'm referring to.
STEP 1-6: Make as directed by LiriGal's pattern. After completing step 6, I wove back around through the netting and popped out the center bead of each arch by skipping that bead. That creates neat little points.

STEP 7: Do this step as directed but weave back around each picot a second time, skipping the center bead. Doing this makes those little crosses of beads more stable.

STEP 8: I won't make the clasp loops as she makes them. I'll come up with something that I like better when I make a bracelet. I skipped the 4 bead netting that she adds on each corner of the bracelet and also changed how the rest of the netting is added and only used 3 seed beads instead of 4. Instead of adding it between the center points of the picots, I did it more like Michelle Skobel's pattern. So, I wove around so that I came up through a left bead of a picot, picked up 3 seed beads, then went down through the right seed bead of the next picot. I repeated this all the way across on both sides.

Next, I wove back around to the netting I just added. For each trio of netting beads, I went through the first one, skipped the middle one and went through the third one, popping out the center bead to form a little point.

The top sample is my tweaked version and the bottom one is one of the samples that I made the other day by following LiriGal's pattern as written. Some of the beads along the edge do stick up a little, but it's not all that noticeable and I might be able to press the bracelet flat under something heavy. At least it's not all warped like my other samples came out.

You can read more about my experiments with this pattern HERE and HERE. The beads that I used in my tweaked sample are Miyuki 11/0 seed beads "Dark Bronze (11-457D)" and 4mm
"Peridot Twilight" fire polished beads.
 

Friday, August 1, 2014

Playing with my Beads...LiriGal's vs Michelle's bracelet


I just made two samples of LiriGal's unnamed pattern and Michelle Skobel's "Stacked Sparkle" (aka "Doubled Crystal Cuffed Bracelet") pattern using the same beads. Although they do start out about the same, and have a lot of similarities, you can see that they're not really the same pattern at all. Perhaps LiriGal got the idea from Michelle's pattern and added her own tweaks. Unfortunately, her version doesn't work all that well. It warps too much and the ovals of seed beads around the fire polished beads aren't evenly shaped. I think there are just too many seed beads even though the overall design is very pretty.

I really like Michelle's bracelet but the look is very different than Liri's. I think that the edge netting on Michelle's is a little bit busy though even with the little tweak that I added. The edge of my sample came out a little too wavy even though I heeded the advice of the pattern to keep my tension loose. So, I went back around the outside edge and popped out all of the center point beads. That helped quite a bit and gives the netting more shape. Before it just looked like a jumble of beads. Now it lays a lot flatter than before because the seed bead edging has been pulled up tighter.

Other than the different amounts of seed beads they each used in their bracelets, they both also added their netting in completely different ways. LiriGal added the outside netting by going through the center seed bead of each picot. On the other hand, Michelle's netting is added between the side beads of the picots. Michelle also adds an extra seed bead between the motifs that is added just after you make each of the picots. That's partly why hers looks to have a lot more beads and Liri's has a more open, airy look.

I'd still like to experiment with LiriGal's version and see if I can find a way to get it to stay flat but keep the design intact. I did find a photo of LiriGal's bracelet on her site but there's no pattern available. You can see it HERE. I have no idea how she got hers to lay flat unless she got lucky with her choice of seed beads.


Here are the beads that I used in both samples:
  • 11/0 seed beads Toho "Gilded Marble Turquoise" (TR-11-1703/c)
  • 11/0 seed beads Miyuki "Duracoat Galvanized Light Golden Bronze" (D4204)
  • 4mm fire polished beads "Copper Teal"


Tuesday, July 29, 2014

Playing with my beads...LiriGal's Netted Crystals Bracelet

I don't actually know the name of this pattern and I have no idea where I found it either. I can't find it on LiriGal's site or blog so I must have found it on Pinterest. This is all that I have:
I haven't seen a photo of what it's supposed to look like so yesterday decided to give it a try and see what I'd get. Luckily it does say to use 11/0 seed beads and 4mm fire polished beads.

I love the design. It reminds me of cathedral windows. However, I can't figure out how to keep it from coming out all wonky. I thought that the beads I used might be making a difference so I tried four different types. Here are my four samples:

The silver sample isn't too bad. Those are Miyuki Duracoat Galvanized "Pewter" (D4222) beads which are a little smallish and not very shiny. They're not matte but they have a slightly rough surface.

My second sample (center right sample) has Miyuki "Metallic Chocolate" (461) seed beads, which are pretty much average in size and shiny. It came out a lot more wavy than the silver one.

At that point I was starting to think that smaller beads might work better so I tried the Miyuki "Olivine" (458) beads next (center left sample). They're very small for 11/0's BUT, they're also very shiny and slick. The results were the worst of all. That gave me a clue though so for my last sample I used matte metallic beads. They're Miyuki "Brown Bronze Matte" (457P) and that sample (bottom sample) came out the flattest of all of them. I still don't like how the edges of the bracelet curl up a bit though and I'd rather make the pattern with regular shiny metallic beads.

Here's a side shot so you can see more easily how wavy they are:

This would make such a pretty little cuff bracelet (it's about an inch wide) so I'm going to keep working on it to try and find a combination of beads that will allow it to lay flat but still keep the lovely design. I think I'll probably need to use some 15/0 seed beads in a few places perhaps. I'm open to suggestions if anyone wants to give this a whirl.

The two kinds of 4mm fire polished beads that I used are "Alexandrite Celsian" (in the silver sample) and "Pink Coral Moon Dust" in the other three samples.

Here are links to LiriGal's sites:

Liri's Gallery of Beaded Jewelry

Lirigal on Etsy

LiriGal's Blog


UPDATE:  I found out where the pattern came from. It's by Michelle Skobel and you can buy the pattern HERE. This pattern also goes by the name "Stacked Sparkle Bracelet" and was published in Bead & Button Magazine in April 2010.

I have a pretty good idea why I had so much trouble with my samples. LiriGal used a different number of seed beads in her netting in a couple of places which is why I got those pretty little arches that you don't see in Michelle's version. But, I think it's also why my samples came out wonky. The Bead & Button article does have a tip about using loose tension, which might also make a difference.


Sunday, July 27, 2014

Tutorial for the "Mystery SuperDuo Bracelet"

Pascale G-Mikovic's Original Bracelet

I still don't have the real name for this bracelet, which was designed by Pascale G-Mikovic, but it's become a huge hit on Deborah Roberti's Facebook page. Pascale allowed Deb to post her photo tutorial for the basic stitch but this still left us having to guess how to do quite a few steps. At Deb's suggestion, I'm posting the basic steps that aren't shown in the photo tutorial, in particular how to turn the corners to add each row. You can click the photos to see them full size. I've only added photos to the steps that I thought required a little better explanation.

PASCALE'S "MYSTERY SUPERDUO BRACELET"
Materials:

  • 11/0 seed beads (SB11)
  • 8/0 seed beads (SB8)
  • SuperDuo beads (SD)
  • FireLine or Nymo B
  • Clasp
1. Pick up one SD + one SB11 + one SD. Slide the beads down to the end and leave a tail long enough to add half of the clasp later. Go through the other hole of the SD you just exited.

2. Pick up one SB11 and go through the empty hole of the other SD. Go across and through the other hole of the SD then continue on through the SB11 and the other SD.


3. Pick up one SB11 + one SD. Repeat this for the length of the bracelet, ending with a SD.

4. Go through the other hole of the last SD. Add one SB11 between each SD. Once you reach the end of the bracelet, go through the SD, SB11 and SD on the end. Pull the beads snug.

5. Go through the other hole of the last SD, then go through the SB11.


6. Pick up one SB8 + SB11 + SB8. Go back around through the SB11 you just exited.


7. Continue on through the next SD and SB11.


8. Pick up one SB8 + SB11. Go through the previous SB8, going toward the SD but don't go through the SD. Then go back around and through the SB11 you just exited, then continue on through the next SD and SB11. Repeat this for the length of the bracelet. At the end of the row, exit through the last SD.


9. Flip the work around and go through the last SB8
10. Pick up a SD and go through the next SB11.
Repeat adding SD's in this manner for the length of the bracelet. Add a SD on the very end after the last SB11. Go up through the SB8 on the end.
 
11. Circle around through the next SB11, SB8 and SB11 of the little "cross" of beads near the end of the bracelet. Exit through the inside hole of the SD on the end.

"Cross" of beads highlighted in red:
"CROSS" OF BEADS

1
2

3


4

12. Go through the other hole of the SD. Add one SB11 between each SD for the length of the bracelet. Exit through the last SD.

13. Go through the other hole of the SD then circle around through the "cross" of seed beads starting with the SB11 from the previous row.
1
2


3

4

After going through the SB8 on the end of the bracelet, go through the inside hole of the last SD going from the inside to the outside. Make sure that you're working on the row that you just added and not the row with the tail thread.
Flip the work around then go across and in through the other hole of the SD and continue on through the next SB11.
14. Pick up one SB8 + SB11 + SB8. Go back around through the SB11 you just exited.

15. Continue on through the next SD and SB11.

16. Pick up one SB8 + SB11. Go up through the previous SB8, going toward the SD but don't go through it. Then go back around through the SB11 you just exited, then continue on through the next SD and SB11. Repeat this for the length of the bracelet.  Exit through the SD on the end.

17. Repeat steps 9-16, adding as many rows as you'd like for your bracelet. Finish off the ends of the bracelet and add a clasp as desired.

Inspired by Deb's comment about using 3mm beads in place of the 8/0 seed beads, I made this little sample using a variety of 3mm beads. As you can see, the pattern works quite well with druks, fire polished beads and also with bicones.


UPDATE 3/24/15: I edited the tutorial slightly and added a few more photos to steps 6-8. 

UPDATE 6/30/20: Bronzepony has a YouTube video for making a bracelet that looks pretty much the same as Pascale's but she uses a different method to make hers. Click HERE to watch her video. 

UPDATE 9/7/20: JP from JRPDesigns just posted a video tutorial for a bracelet that looks similar this but with all 11/0 seed beads. Her method is different than Bronze Pony's and the original from Pascale. Watch her video HERE. By the way, Bronze Pony's version also uses all 11/0 seed beads.

Save